How to Setup OBS for Slipmat.io
You will need to download OBS Classic or Studio, the difference between the two is OBS Classic will allow you stream mp3. Where OBS Studio is a complete rewrite of the original OBS from the ground up, with the main goals being multi platform support, a more thorough feature set, and a much more powerful API.
OBS Classic
OBS Studio
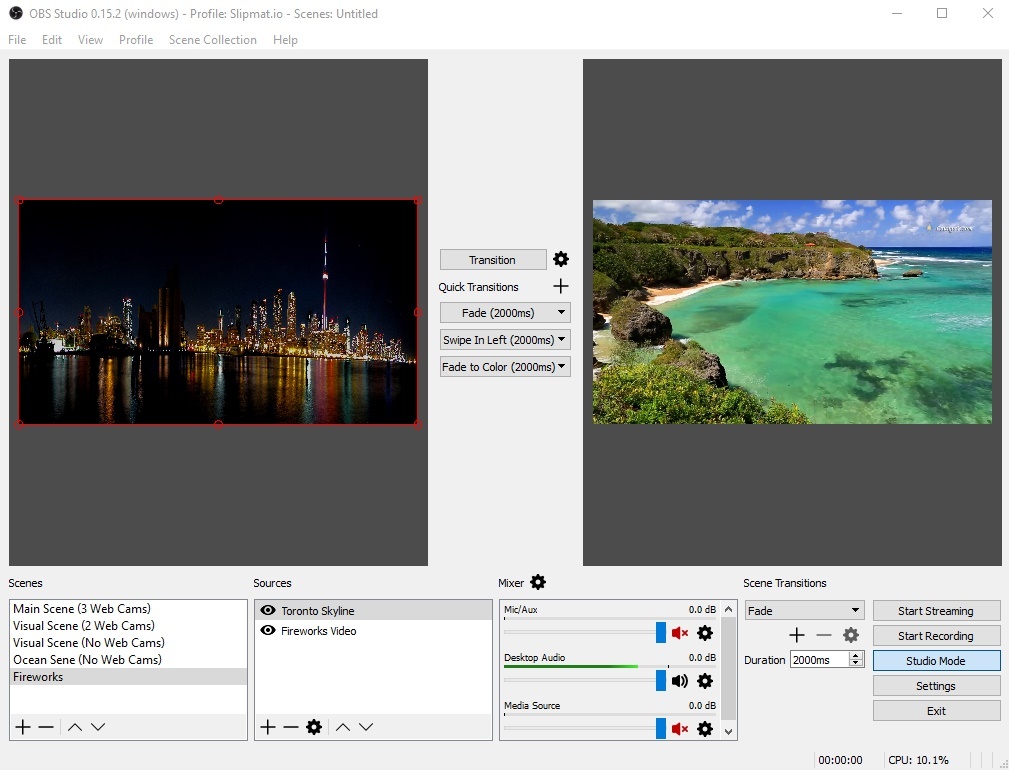
As you can see in Studio Mode using OBS Studio you can preview and or edit your other scenes before you transition to them where in OBS Classic there no preview of your scene.
For this set of instructions we will be using OBS Studio but the setting are about the same for OBS Classic just the interface is slightly different.
General
- Show confirmation for starting/stopping streams
- Enable/Disable Source snapping
- Enable/Disable automatically record when streaming
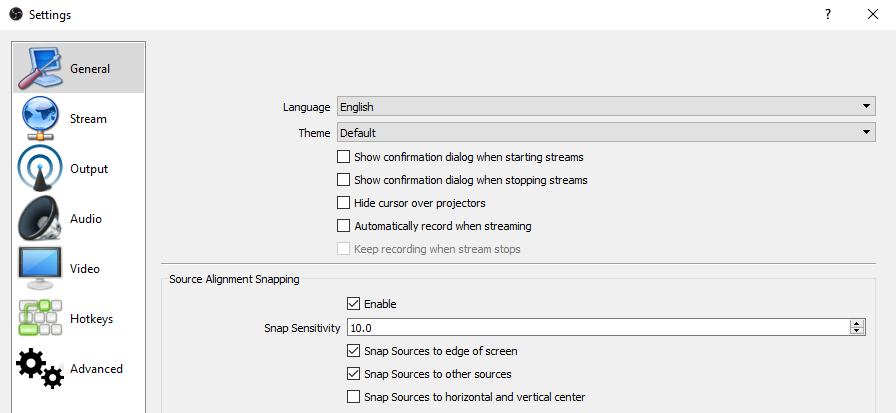
Pretty much you can leave this as a default.
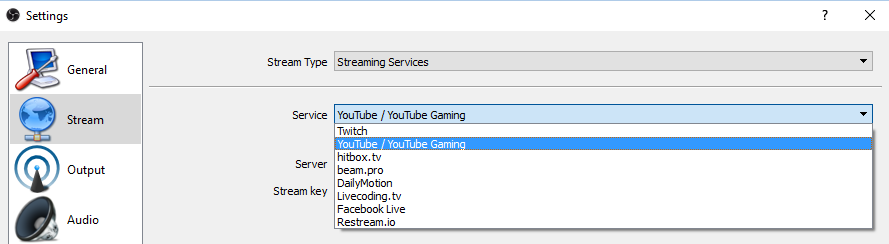
Stream
- Select one of the included Services (Activate show all services to see the full list in the dropdown) or change the Stream Type to Custom Streaming Server
- Select the server or enter its URL
- Enter the Streamkey from Youtube
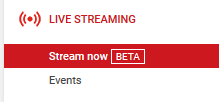
If you prefer to have customize setting click on the Stream Type and select Custom Streaming Server. If you haven’t done so you need to setup your Youtube account for live streaming, you can tell by going to your account and in the top right hand corner where your logo is and select
from there you should see LIve Streaming and if you expand that you should have Stream Now [Beta]
![]()
From here you should be able to get your Server URL and Stream Name/Key Information
Output
- Simple Mode allows you to Stream with the set Bitrate/Encoder and Record using a preset (Same as stream/High Quality/Indist.Quality and Lossless) and a different Encoder (if available)

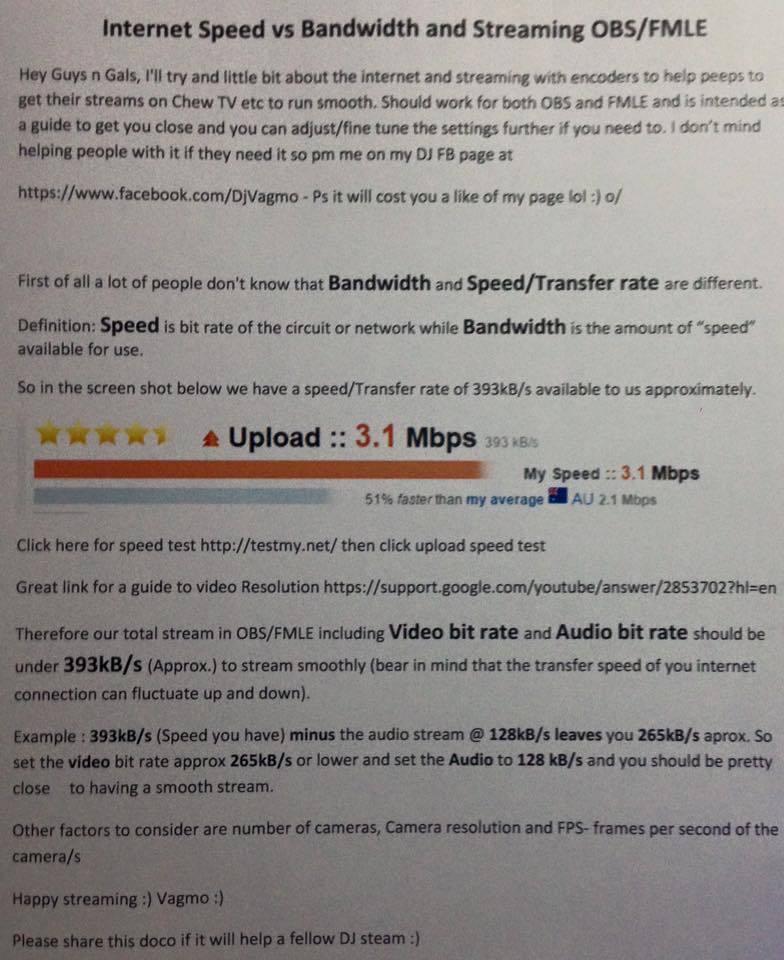
For setting your Video Bitrate according to your upload speed check out these two website
- OBS Estimator - Will help you determine the best setting based on your computer, video card, upload speed and resolution.
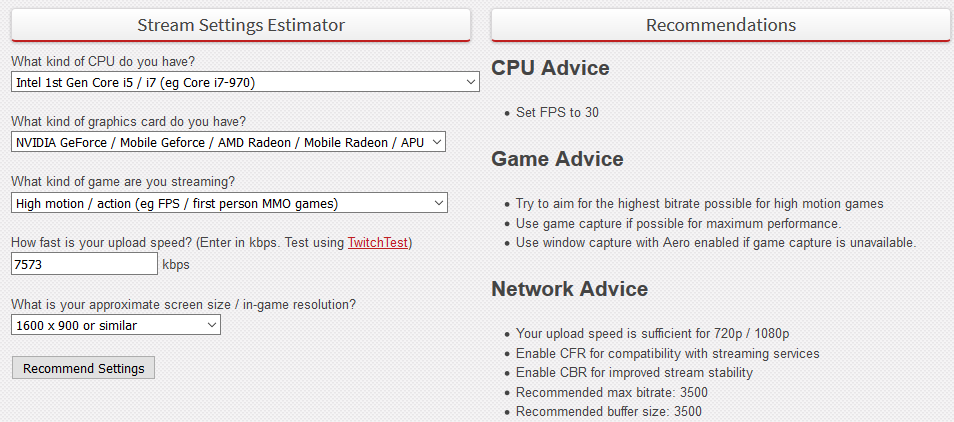
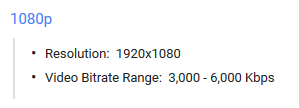
- Youtube Live encoder settings, bitrates and resolutions - This give you base information for setting of streaming video such as 1080p, 720p @ 60 fps and so forth
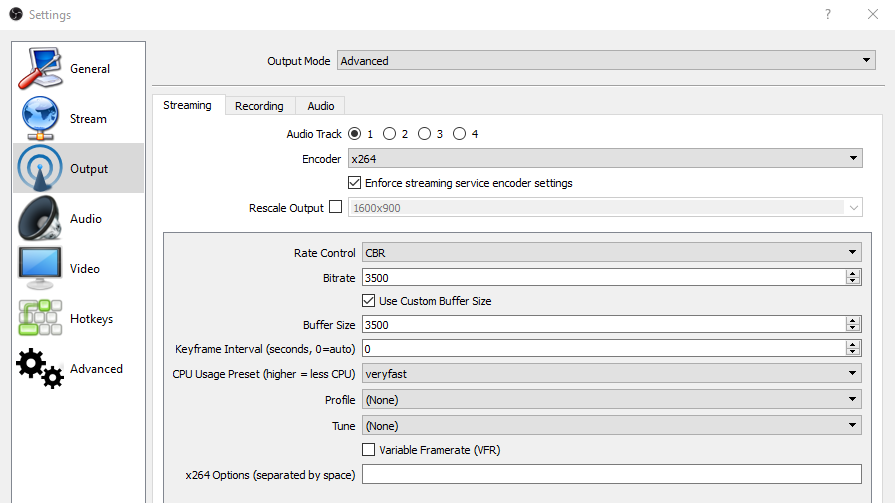
According the setting if you wish to implement the recommendations you have to change to Advanced Mode gives you further options to configure your Stream and Recording independently if you want to.
- Set your Video Bitrate according to your upload speed and the limitations of the service you use (for example 3500 kbps max)
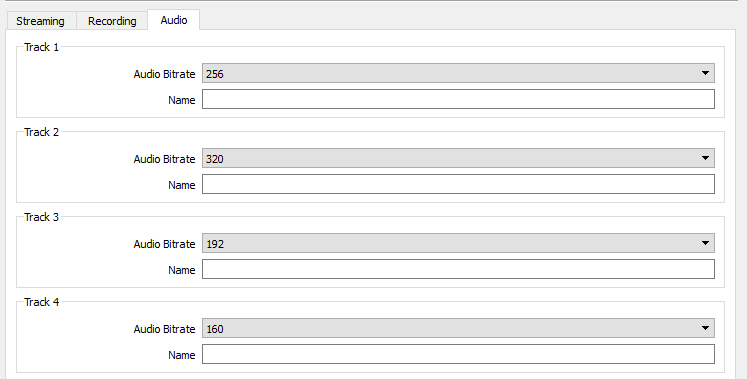
- Set your Audio Bitrate accordingly (around 256 kbps for streaming, lower if you have a low upload speed)
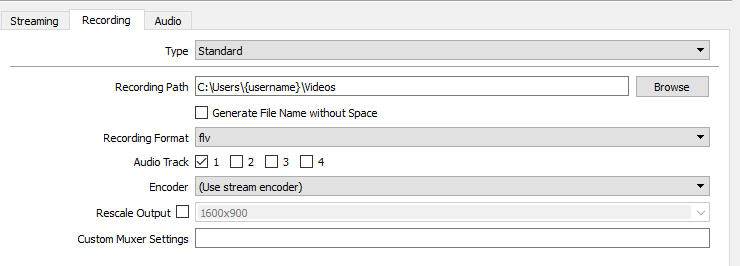
- For Recording
- Set your Recording Path
- Select the desired Recording Quality and Format
- Select a Hardware Encoder if available (only if you use a different preset than “same as stream” and if a Hardware Encoder is available)
Audio
- Change the Sampling Rate
- Select up to two Desktop Audio Device’s
- Select up to three Microphone/Auxiliary Device’s
- Enable Push-to-mute or Push-to-talk for each device (linked to the Hotkeys settings)
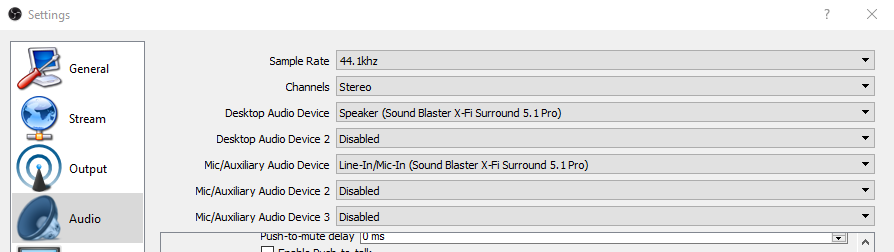
Configure the audio to what are you going to use to stream your audio from
Video
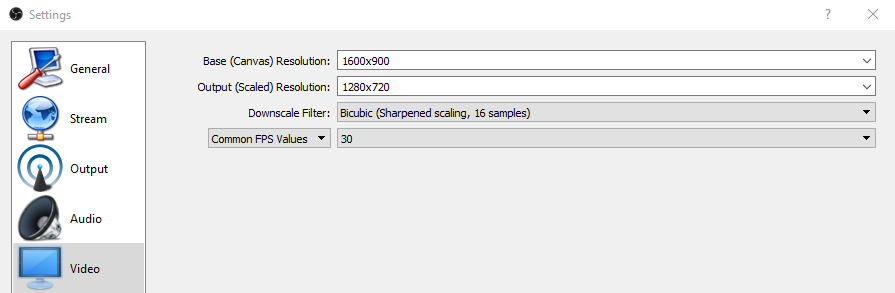
- Base (Canvas) Resolution should fit to your Main Input Resolution (Desktop Monitor, Console, Game Resolution)
- Output (Scaled) Resolution should be the Stream Output Resolution (720p,480p,etc). Leave on default if you want to use the scaling options under Advanced Output.
- Common FPS Value should match your desired output FPS (30/60 for example)
Youtube Live encoder settings, bitrates and resolutions - This give you base information for setting of streaming video such as 1080p, 720p @ 60 fps and the output resolution
Hotkeys
- Set Hotkeys to Start/Stop Streaming/Recording
- to Hide/Show Sources
- for Push To Talk /Push To Mute
- to Switch to a specific Scene

You could spend a lot of time setting this all up so I will leave this up to you if you want to spend the time filling this in :).
Advanced
- Change the Filename Formatting (or use folders: %CCYY%MM%DD%hh-%mm-%ss = 2016 \ 07 \ 10 \ 12:35:25.flv)
- Activate Stream Delay
- Configure Automatic Reconnect
Do not touch anything else in Advanced unless you absolutely know what you’re doing.
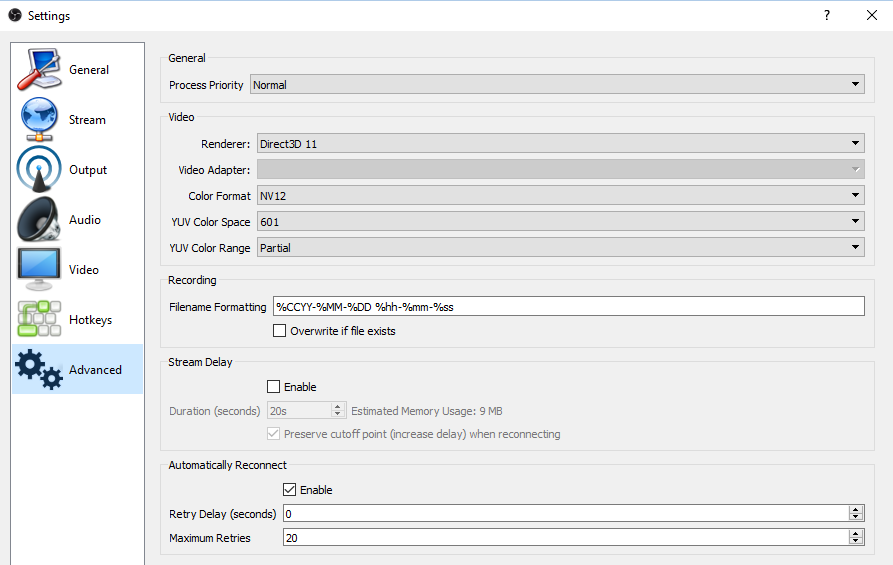
The only thing I would recommend to change is enabling Automatically Reconnect and set the retry delay (seconds) to 0, this way for any reason you might get disconnect it will reconnect with a minor hiccup for the listeners.
Thanks Slipmat.io