How to Setup XSplit for Slipmat.io & Youtube
You will need to download XSplit. XSplit has a free version but it is very limited in your broadcasting settings. The cost to use XSplit is about $39.95 USD per year ($3.33/month), they do give a discount for 36 month subscription @ $89.95 ($2.50/month) and finally a Lifetime @ $349.00 (*Note prices are subject to change without any notice)
Here are some Pro and Cons with XSplit Vs. OBS
Pro.
- Very Easy to setup
- Ease of creating multiple scenes
- Better manipulation of sources including video, chroma key, color key and so forth
- Stream to multiple sites at the same time (not that you would want too)
- Ability to test your video & audio setting before stream for any latency
Con
- Free version is very limited in broadcasting, basically it sucks
- Cost to stream at higher resolution and
- Can’t do Audio above 192 AAC
- Prefers if your computer/laptop has a dedicated video card
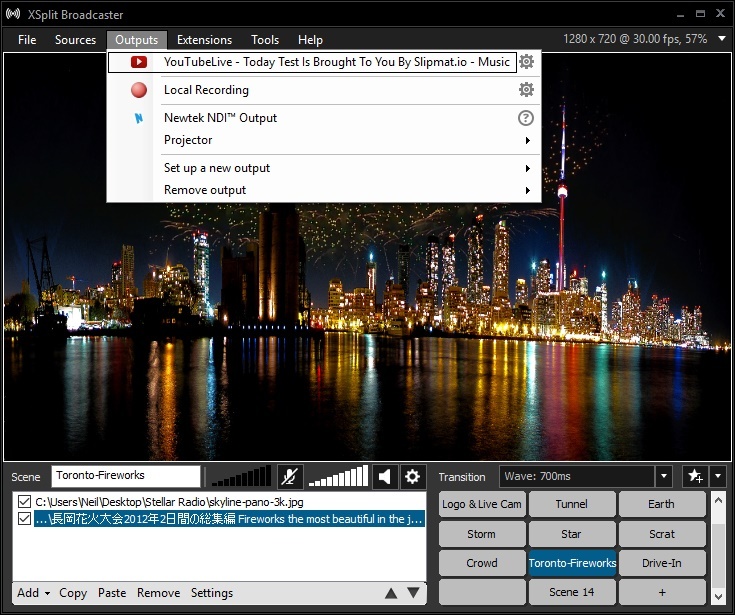
Once you have launch XSplit Broadcaster, click on the Outputs and see if you have YouTube
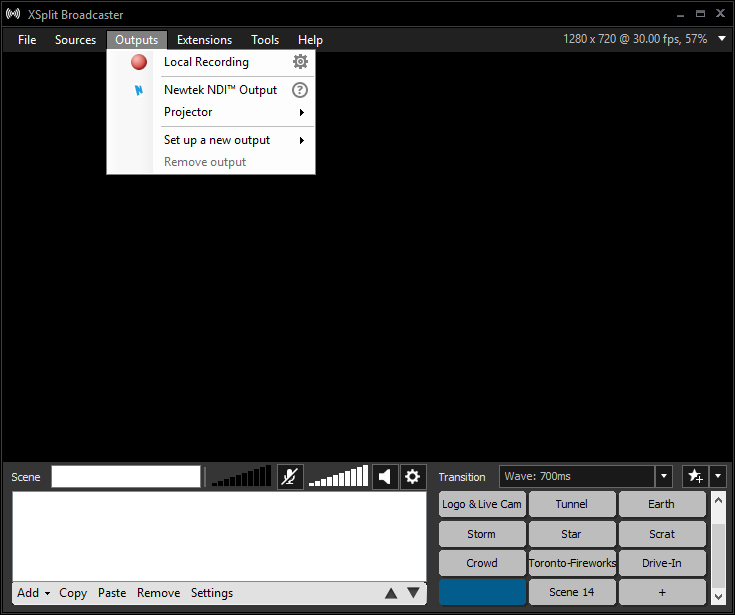
If you don’t you will need to click on Set up a new output

Select YouTube Live, if you do not see it here then click on Get more outputs and from there you should see YouTube Live

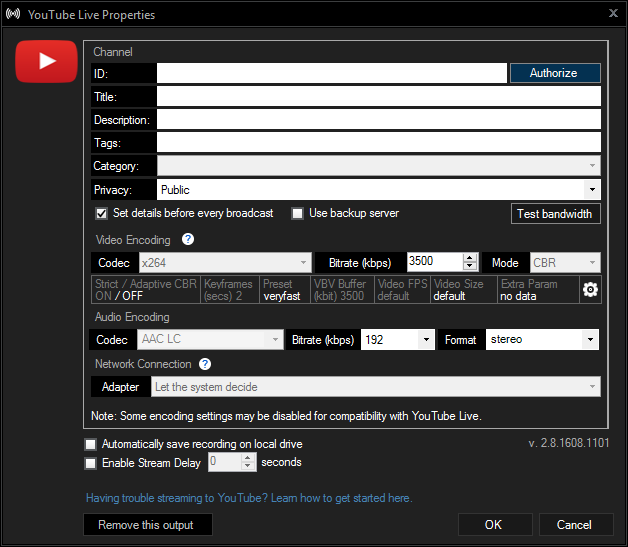
Now that you have YouTube plug-in installed you will now need to configure it, once again from the Set up new output and select YouTube Live. Then click on Authorize button in the top right hand corner
At this point you will be asked to login your Google Account that is associated with your YouTube

If you have more than one account associate you will be prompted to select which account. From there you will need to Allow XSplit to access your YouTube account

Once you are Authorized you will see your account you associate with show up in your ID: then click on the OK button

Now you will need to do some configuration for YouTube by clicking on the option button next to your YouTubeLIve

First thing you should do is uncheck Set details before every broadcast this will allow you set the Title, Description and Tags before each stream.
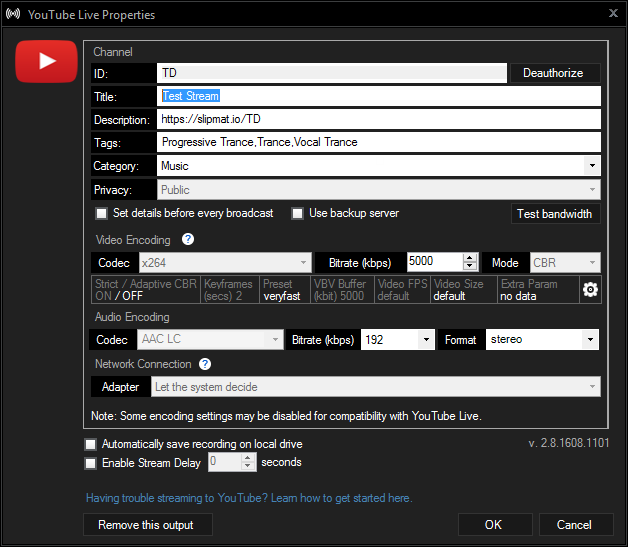
From here you can also setup your Video Encoding and your Audio Encoding settings
For setting your Video Bitrate according to your upload speed check out these two website
- OBS Estimator - Will help you determine the best setting based on your computer, video card, upload speed and resolution.
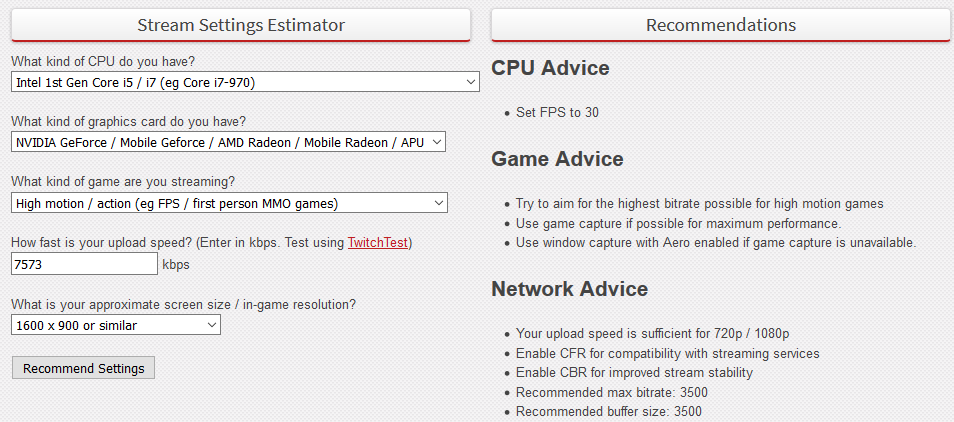
- Youtube Live encoder settings, bitrates and resolutions - This give you base information for setting of streaming video such as 1080p, 720p @ 60 fps and so forth
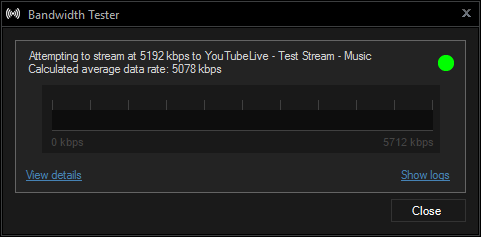
Here is the nice feature in XSplit is that you can click on Test bandwidth and it will test your current configuration that you have set for Video Bitrate + Audio Bitrate (remember Audio is limited to 192)
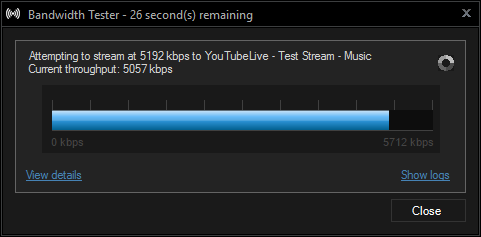
If everything is good you will see a green signal to show you setting are good to broadcast,
Green: The target bitrate was achieved and no frame was dropped
Yellow: The target bitrate was not achieved for all measurements. You should lower the bitrate and retry.
Red: Frame drops were present. You should not use this target bitrate.
Once you are happy with your setting click on the OK button and your about ready to Stream.
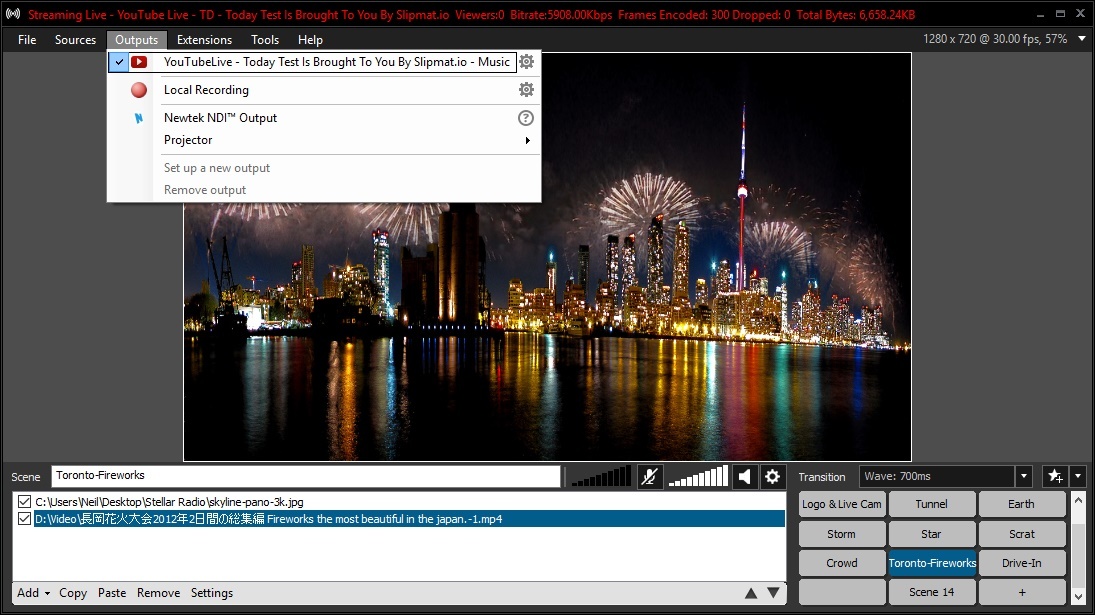
To stream all you need to do is click on the Outputs from the top menu and select YouTubeLive
As you can see because I change the Title within XSplit it automatically changes it on YouTube page also there is not need to setup the broadcasting settings.

To stop streaming after your show click on Outputs again and select YouTube Live and this will stop your streaming.
Thanks Slipmat.io